Friday, April 30

Tools As Gifts... New Projects &Tags...


I LOVE TO PLAY!
One of my favorite units in high school art class
was stained glass. The electives in college were
always very expensive... and usually full.
Last year I purchased a supply of glass pieces
for a song... they have sat waiting!
Rose (a very sweet blogging friend)
and I shared a conversation about
different projects we would like to do...
Sweet little charms are on BOTH our to-do-lists!
I told my Sweet 16, who told her daddy...
and...
LOOK what I got for my birthday!


An extra hand!
This is the sweetest little helping tool~
They found it at Hobby Lobby craft store.
The solder is lead-free, too!

When I get A LOT more practice... I will share
some how-to-tips. For now I will call them
Teddy Bear Charms!
A wee-bit shabby for people wear! ha! ha!
Tiny little fabric originals tucked between glass~


Some fun I'm having with new fabric illustrations...
I took pictures of them along side one of my
sketch journals... you never know where a pattern
or simple sketch might lead you!


Fancy buttons as flower heads!
Loads of fabric illustrations to list in my Etsy Store...
Paisley, flowers, more feathered friends... snails...
Hope to have them on in a day or two~

Must tend to the THOUSANDS of baby maple trees
trying to grow in our flower gardens...


More new tags! These are the little extra's I like
to tuck in with my Etsy sales... a little thank you~


I search for stamps at antique shops...
I use old ones in some of my collage pieces.
Last summer we found a gallon-size Ziploc bag
stuffed with foreign, canceled stamps.
Time to share them!


One side of the tag is stamped with "Art"...
on the reverse, a floral stamp from
somewhere around the world!

Hope your Friday is off to a great start!

Wednesday, April 28

Giraffe Treasure and Clothespins...


This adorable needle felted treasure keeps
company with my Sweet 16's felted family...

Bird on Wire Studio has one for sale!!
Abby also has other adorable needle felts in her store.
Her work is gorgeous and makes us smile!


Found this WONDERFUL bag of old clothespins today!
I love to hang our laundry on the line...
95% air dry and then touch-up in the dryer.
These old pins will not hold our laundry...
They are so smooth...
They will be wrapped in my hand-drawn muslin ribbons!
I will share them in my Etsy shop VERY soon!


A very unique clothespin bag design...
Hubby and I laughed to think the hook is strong enough
to support a small lawn tractor!

No more clothespins all over the lawn!
Now let's hope a wild critter
doesn't find it a cozy hammock!


Sweet 16's growing collection of needle felts...
Hope you stop by Abigail's blog...
Bird on Wire Studio
Such a creative gal!

Hope your day is sunny and sweet!


Saturday, April 24

Strawberry Needle Felt Tutorial...


I taught myself how to needle felt by watching
loads of different YouTube videos.
I'm not fond of sewing~ this has been the
perfect way for me to make little characters from
the books I write and illustrate.

There are many approaches to needle felting...
I'll share mine~


These are the products I use.
I purchased mine from a gift shop that sells
wool/tools for rug hooking, products for punch needle,
wool roving (which I use for felting) yarns etc.
If ever you're in Canandaigua, NY
you should stop in at "Liberty Cottage."
Popular craft stores like JoAnn's and Hobby Lobby
now offer this same line.


Roving!
I like to purchase wool locally.
Amy Klee has the dearest farm!
Stone Edge Fibers phone 315/548-2032
I get MOUNDS of wool for the same cost
as a small tuft from the craft store chains.


It all starts with a tiny felting needle.
Please be very careful. They are sharp and HURT!
It's not a little pin prick... the needle has tiny barbs.

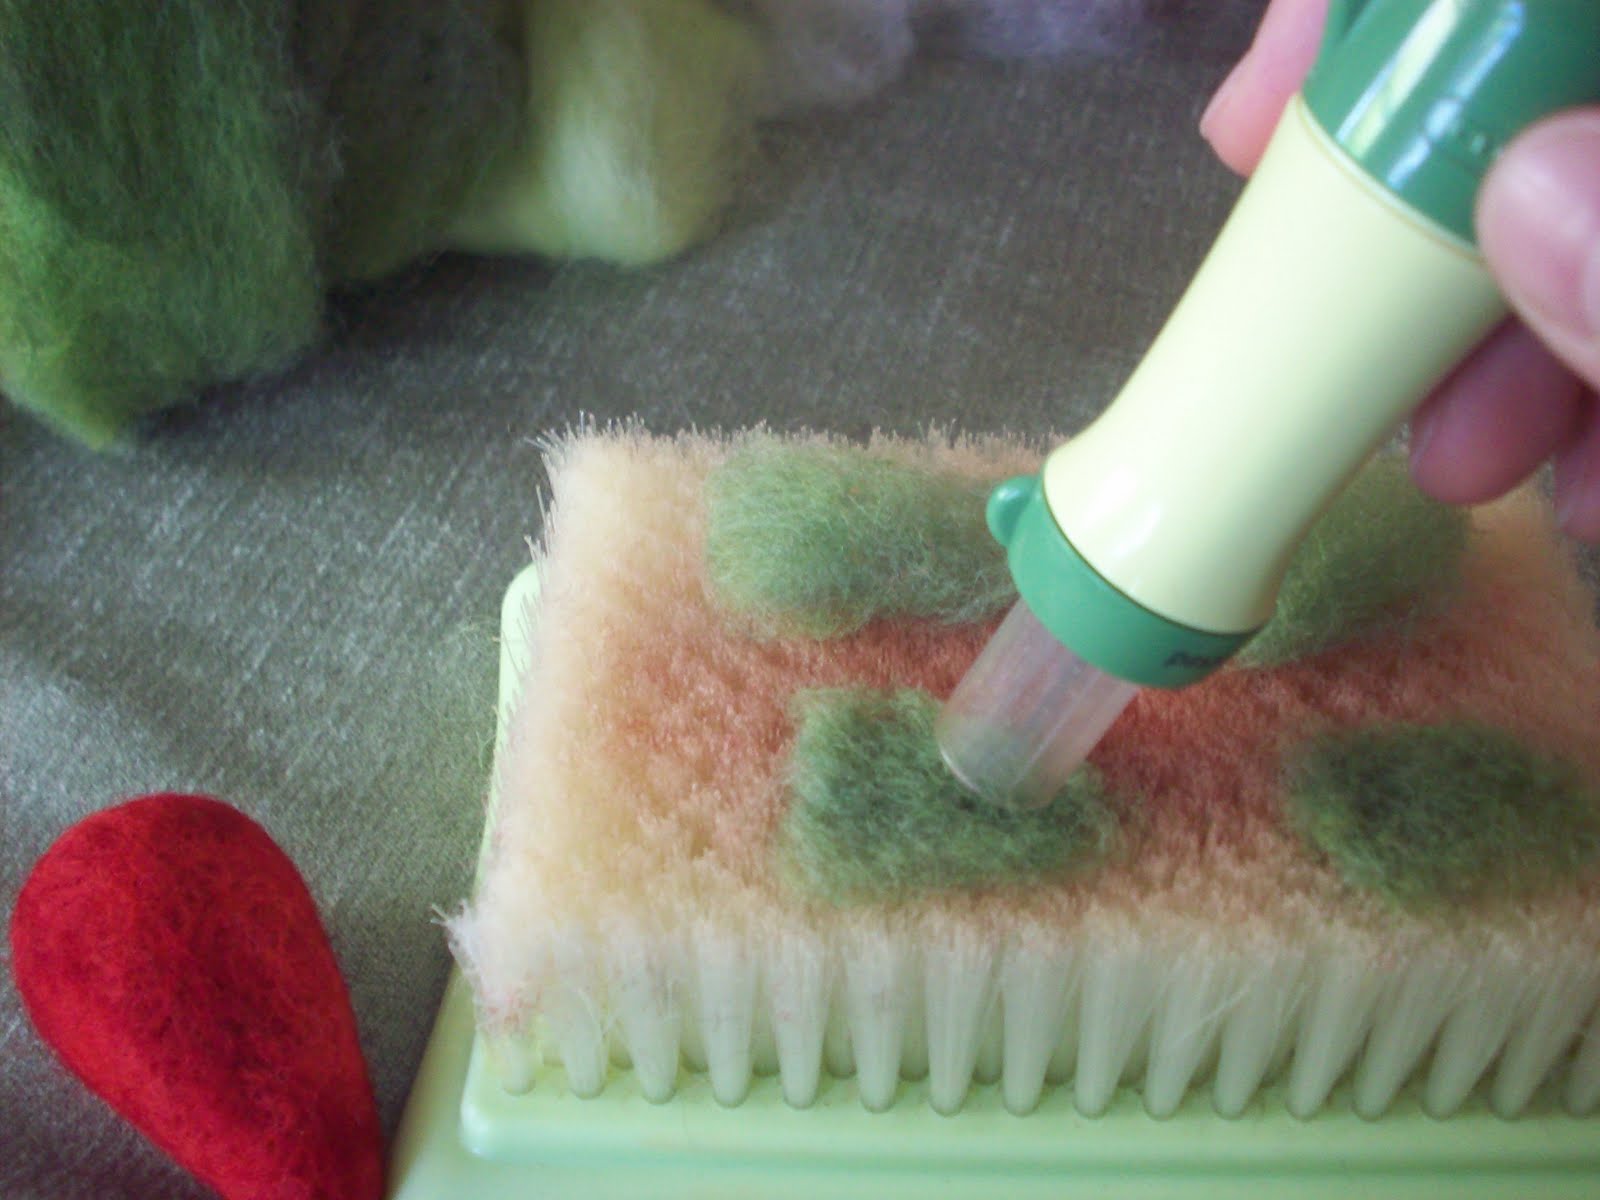
Some people felt on this blue foam.
I prefer the brush. I had this sample left from a class
I taught... it is more economical but the wool felts to it.


Begin.
Gather a tuft of natural wool and compress
it to the basic shape of your design.
Dyed wool is more costly...


...Begin felting by inserting the needle
over... and over... and over... etc.
Keep in mind the shape...


Now you have a basic shape.
(Zillions of needle jabs later...)
If you needle felt lightly~ your piece will be fluffy.
If you needle felt A LOT~ your piece will be solid.
The more needle work the tighter...
Personal preference...


Time to add color.
Take a very thin amount of dyed roving...
Notice in the photo how thin/see through my piece is?
It doesn't take much to cover.


Needle... needle... needle... etc.


Keep going...


Ta! Da!


Again... several different ways to add leaves.
I'll show you two.
First... four tufts of green roving.


The need for speed... (ha! ha!) Impatient Michelle...
This tool has five needles in it! The plastic guard
keeps you safe and protects the needles from breaking.
It stays extended until you apply pressure.


Felting the green roving into flat leaves.
Felt one side, pull it up, turn it over... felt the other side
until you have a compact tuft.


Shape with a single needle...

Watch your fingers if you're not working
against the pad...
Add the leaves. They'll felt to the strawberry.
The barbs in the needle... it's magic! :)


So I only made four leaves the first way. I'm not a
symmetrical person. I design with odd numbers.
I left this space to show you another way to add leaves.
Gather a small tuft of green wool...


Start felting the shape of a leaf to the berry...


I think this way is a little easier.
Takes out a step or two...
Use the first process if you want
your leaves to be free-standing.

(click the bold area to see free standing leaves)
Strawberry leaves free standing...
(click the bold area to see free standing leaves #2)


They will look a little different...


I have my leaves on... I need to cover the top.


Needle... needle... needle...


Stem or loop... I'm making a loop.

To make the stem from the same roving...
A small tuft of wool, roll it in your fingers and needle
to the pad, continually turning, rolling etc.


I leave the ends a bit feathery so the fiber can
mix in and attach strong.


Needle... needle... needle...


I added a few little tufts in between the larger leaves.
You can add seed beads, yellow stitched X's etc.
The two links for the leaves show strawberries
I made that have seeds on them.


I hope I wrote this tutorial in a way that
will encourage you to try! It is very easy... fun...
Like all art~ each piece is different, unique and perfect!

I will try to answer questions as you begin...
The YouTube videos are helpful. Watching all of the
needle... needle... needle... work helps you understand
how long it takes to see results.

Hope your weekend is sunny and sweet!


Friday, April 23

Loads of New Fabric Art to Share!


Thank you for so many WONDERFUL and sweet
comments for our Wilcox giraffe!
My Sweet 16 enjoyed reading each one...

She names EVERYTHING!
Finding her names in old love letters, receipts etc.
Her large collection of antique photographs
is filled with delightful names~


How long did Wilcox take to make...
Needle felting is measured in movies~ ha! ha!
We watched "Finding Neverland, Miss Potter,
French Kiss, Pride and Prejudice (new),
Fried Green Tomatoes,
P.S. I Love You and The Dutchess."
Our sweets have had spring break this week...
Movies, walks, road trips etc. instead of homework!


Doesn't this little guy make you yawn?
I would LOVE a real teddy like him to cuddle in with...


Little pout friend...


(smile, snicker...)
This was a bear... but ended up looking like a pup!


A favorite...
If I could sew bears~ I would make him!


You knew I had to add feathers somewhere!! ha! ha!

I will have more fabric pieces soon...
My next post will be a little tutorial on needle felting.
When I teach friends we make strawberries...
That is what I will share with you~

Hope your Friday is sunny and sweet!

Tuesday, April 20

Wilcox has his first photo shoot!


As I stitched on the last button...
My Sweet Sixteen had her camera ready for pictures!
Lawn daisies and sunshine welcome
sweet WILCOX!


Sweet 16 selected his button eyes from her
collection of black glass...
She loves how they catch the light!


Wee little tail...


Eye lashes that make you tilt your head in awe...


Sweet 16 loved reading all of your thoughts
and comments... especially about long eyelashes!
She has long eyelashes and LOVES that about Giraffes~

Hope you have a nice evening!